Simple Embroidery Stitches (That Do Most of the Work)
If you’ve ever Googled ’embroidery stitches for beginners’ and felt like you accidentally enrolled in a graduate-level fiber arts program, you’re not alone. There are a lot of embroidery stitches. Entire books have been written about them. Entire people have dedicated their lives to mastering them. And while that’s lovely, it’s also completely unnecessary when you’re just getting started.
The truth is this: you only need a handful of stitches to make something beautiful. Not impressive-for-Instagram beautiful. Real, satisfying, I made this with my hands beautiful.
Here are the MVPs — the stitches that show up in most projects and actually get things done.
The Running Stitch: Simple, Reliable, Underrated
The running stitch is the simplest stitch you can make, but don’t let that fool you — it shows up everywhere. It’s exactly what it sounds like: needle up, needle down, repeat. Small stitches, evenly spaced, moving forward in a line. Like you’re running on a track.
You’ll use it for:
- Light outlines
- Simple patterns
- Adding texture without fuss
It’s often dismissed as “too basic,” which is a shame, because basic is what lets you relax. And relaxed stitching is good stitching.
If your running stitch looks a little uneven at first, congratulations: you’re doing it correctly.
How to Learn It:
If you’d like to see this stitch in action, this simple tutorial explains it clearly step by step:
Working the Running Stitch – the Spruce Crafts
If you prefer learning by video, this calm demonstration shows the running stitch slowly and clearly:
Running Stitch Tutorial – Sarah Homfray Embroidery
The Back Stitch: The Quiet Workhorse
If embroidery had one most valuable player, it would be the back stitch.
This is the stitch you’ll use all the time, especially for outlines, lettering, and anything that needs to look clean and intentional.
Think of it as taking small steps backward on top, but big steps forward underneath, which creates a continuous line with no gaps. Once you get into the rhythm, it’s incredibly satisfying.
You’ll use it for:
- Outlining designs
- Words and quotes
- Any time you want your stitching to feel confident
Master this one and you’re already ahead of the game.
How to Learn It:
This beginner-friendly guide walks through the back stitch slowly and clearly: How to Work the Back Stitch in Embroidery – the Spruce Crafts
If you prefer learning by video, this gentle tutorial shows the backstitch step by step:
Back Stitch Tutorial – Sarah Homfray Embroidery
The Satin Stitch: Smooth, Shiny, Surprisingly Forgiving
The satin stitch looks fancy. It feels fancy. And somehow, it’s not nearly as intimidating as it appears.
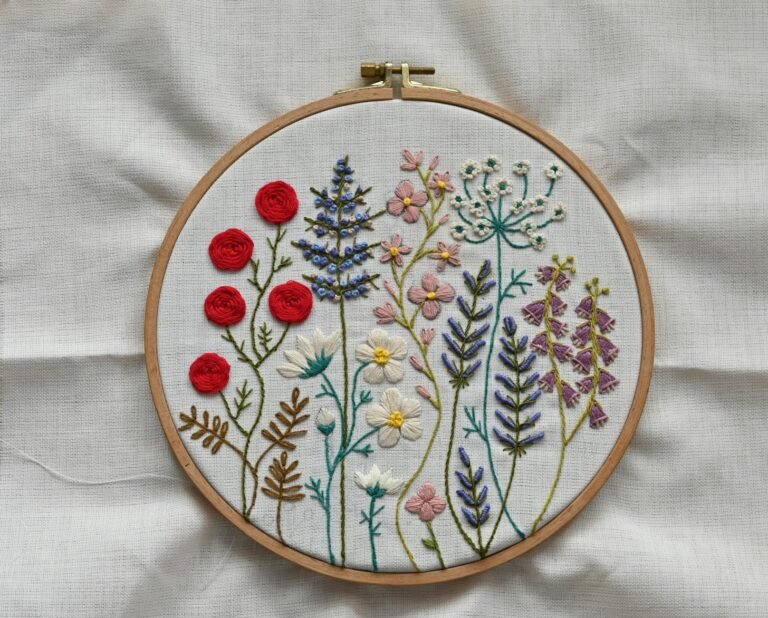
It’s used to fill in shapes by laying long stitches side by side. When done slowly and patiently, it creates that smooth, polished look people associate with embroidery.
You’ll use it for:
- Filling petals, leaves, and shapes
- Adding bold areas of color
- Creating that ‘finished’ embroidery look
Pro tip: smaller shapes are easier than large ones. You don’t need perfection, just consistency and a little patience.
How to Learn It:
This tutorial shows how to keep satin stitches smooth and evenly spaced:
How to Work Satin Stitch in Hand Embroidery – the Spruce Crafts
This slow, close-up demonstration shows how to keep satin stitches smooth and even:
Satin Stitch Video Tutorial – Mary Corbet Needle ‘n Thread
French Knots: Optional, Temperamental, Not a Moral Obligation
Let’s talk about French knots.
Some people love them. Some people tolerate them. Some people quietly avoid them for years. All of these approaches are valid.
French knots are small, raised dots made by wrapping thread around the needle before pulling it through. They’re often used for flower centers or tiny decorative details.
You’ll use them for:
- Texture
- Small accents
- Feeling accomplished once they finally cooperate
And here’s the important part: you do not need to master French knots to be “good” at embroidery. If they frustrate you, skip them. Embroidery should feel calming, not like a test of character.
How to Learn It:
If you decide to make peace with French knots, this tutorial explains them clearly (and kindly):
Step by Step Embroidery Stitch Guide – French Knot – DMC.com
If French knots have ever tested your patience, this tutorial explains them clearly and kindly:
French Knot Tutorial – Mary Corbet Needle ‘n Thread
What You Don’t Need (Yet)
Right now, you don’t need:
- 40 different specialty stitches
- Complicated diagrams
- The feeling that you’re ‘behind’ if you don’t know everything
You need repetition. Comfort. Familiarity. The quiet confidence that comes from doing the same few things well.
These stitches will carry you through your first projects, and probably many after that.
If you’re still figuring out how to approach learning embroidery without overwhelm, this guide walks through the process gently before you dive too deeply into techniques: how to learn embroidery without feeling intimidated
What’s Next
Now that you’ve got a small, trustworthy stitch toolkit, the next step is letting your hands get comfortable with these motions.
Before jumping into a full project, it helps to spend a little time practicing — slowly, without pressure, and without worrying about perfection.
And when you’re ready to make something real, I’ll walk through your first embroidery project, a simple design that uses the stitches you already know and the supplies you already have:
Your first Embroidery Project (Keep it Simple, Keep it Fun)
You don’t need to be fancy. You just need to begin.
And you already have.